

 English
 русский
 Español
How Can Custom Metal Stamping Parts Reduce Design Rework
A bracket arrives for an initial fit check. The drawing looks clear, but one hole sits too close to a bend, a flange is slightly out of line with the mounting face, and the fastener will not engage. The machine is working as intended. The drawing simply left an unanswered detail, and the metal has revealed the result.
Custom Metal Stamping Parts are shaped by how sheet metal stretches, compresses, and springs back. Hole positions, bend radii, tolerances, and the flat pattern all interact. Reviewing them together, before tooling is cut, keeps revisions small and deliberate. Here is where rework usually starts and how to head it off.
Where Rework Comes From
A feature can be easy to draw and hard to form. A hole may sit too near a bend, or a narrow section may change shape under load. These problems often show up only when a sample is made or an assembly is attempted.
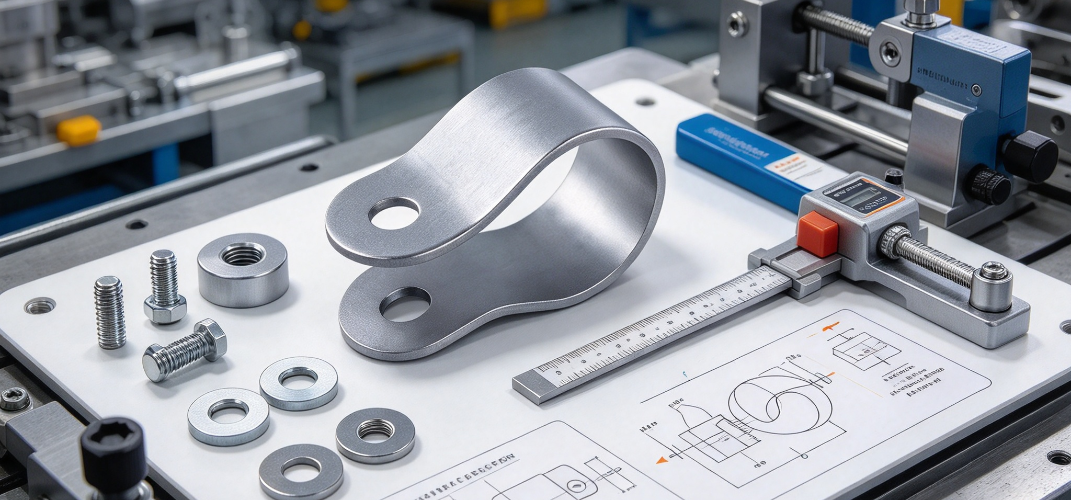
Communication gaps add to the problem. Product designers focus on appearance and function, while manufacturing teams think about tooling access, material movement, forming sequence, and inspection. When each side reviews the part alone, changes arrive after planning has begun.
Common triggers include:
- Holes that leave too little material near an edge or bend
- Bend geometry that interferes with nearby features
- Tolerances that are hard to hold consistently
- Assembly needs that the drawing never states
- Details left open to interpretation
None of these means the design was careless. The part simply moved toward production without a shared review.
Holes, Bends, and Flat Patterns
Hole Placement
A hole may carry a fastener, a locating pin, or a cable. Too close to an edge, the remaining material may deform or crack under load. Close to a bend, forming can pull the hole out of position or change its shape, so it no longer lines up with the mating part.
The right distance depends on material, thickness, hole geometry, and the forming method. Review each opening against the whole part. If a hole must stay near a bend for function, ask the manufacturing team whether a different forming sequence or feature design preserves the result.
| Design Point | Why It Matters |
|---|---|
| Hole-to-edge distance | Preserves material around the opening |
| Hole-to-bend distance | Reduces forming-related distortion |
| Hole alignment | Supports connection with mating parts |
| Remaining material | Influences local strength |
| Fastener access | Keeps assembly practical |
Bend Radius and Geometry
The bend radius shapes how metal moves through the curve. A radius that does not suit the material may cause cracking, surface marks, or inconsistent results. It also affects neighbors: a curve that reaches toward a slot or mounting surface can change the space available there.
| Bend Factor | Design Impact |
|---|---|
| Material behavior | Controls how the sheet forms |
| Bend radius | Shapes the transition |
| Nearby holes or slots | May shift with local movement |
| Part geometry | Sets available space |
| Forming sequence | Influences final shape |
A part can meet its own drawing and still fail in assembly. A flange meant to sit flat against a surface may land slightly off, forcing extra effort on the line. Check the part in its assembled condition. Digital models reveal interference, and physical samples reveal real material behavior. Each catches things the other misses.
Flat Pattern
The flat pattern is the blank before bending. If it ignores bend allowances and material response, holes and cutouts end up in the wrong place after forming. Review the flat pattern beside the finished model so features stay suitable once the metal is formed.
Tolerances and Critical Dimensions
Tolerances state how much variation is acceptable. Stamping is a physical process, so some variation is normal. Tightening every dimension raises cost and inspection effort and makes harmless variation look like a defect. Loose tolerances on the wrong feature let parts fit poorly.
Start with the job each feature does. A hole that positions another component needs closer control than a clearance opening. Ask these questions:
- Does the dimension affect fit with another part?
- Does the feature matter to function?
- Can the process hold it consistently?
- How will it be measured?
- What happens at the edge of the allowed range?
Mark critical dimensions early, such as alignment features, fastener positions, and mating surfaces. Inspection can then focus on what matters, and sample reviews rest on a shared understanding.
Tolerance Stacking
Parts rarely work alone. A bracket joins a housing, a panel, and fasteners, and each carries its own variation. Even if every piece meets its drawing, the combined variation can leave a gap too wide or a hole that will not line up. Identify the dimensions that influence each other and judge the complete fit, especially when several stamped parts share a tight space.
Feedback, Prototypes, and Drawings
Tooling decisions fix how features are formed. Concerns found after tooling is prepared cost more to fix. A review before tooling can cover:
| Review Topic | Question to Ask |
|---|---|
| Hole locations | Is enough material left around them? |
| Bends | Do nearby features survive forming? |
| Tolerances | Can they be measured and held? |
| Forming sequence | Is tooling access practical? |
| Assembly fit | Does it work with mating parts? |
This does not mean simplifying every design. Some features are needed for function. The goal is to understand what they demand from production.
A prototype shows what drawings cannot: hole alignment, bend shape, edge condition, and how the part handles during assembly. When a sample misses, find the cause before editing dimensions. The source may be design, forming, tooling setup, or measurement. Changing numbers without that answer often starts another round of rework.
Drawing clarity matters too. Show bend direction, edge conditions, and tolerance requirements without ambiguity, and keep notes consistent with the geometry. Distinguish the flat pattern from the finished shape. When a revision is issued, make sure everyone uses the current version so old instructions do not linger on the floor.
Working With a Supplier
Share the intended application and assembly needs before production planning begins. Tell the supplier which features affect fit and where variation would cause trouble. Discuss material, hole placement, bend geometry, tolerance expectations, and inspection. If the part joins other components, send related models or drawings.
Bring design, production, quality, and assembly staff into the review where possible, since each sees different problems. Record decisions so the same question is not argued twice.
When manufacturing conditions and product needs are weighed together, changes become deliberate. Teams then prepare drawings, evaluate prototypes, and plan tooling with fewer surprises, and Custom Metal Stamping Parts arrive closer to the design intent.

 Yongkang Ruizan Industry and Trade Co., Ltd.
A company specializing in metal stamping and mold design and manufacturing.


- Phone: +86-18072455799
- Email: [email protected]
- Address: No. 23, Qilong Road, Natural Village, Zhiying Town, Yongkang City, Jinhua City, Zhejiang Province, China
Copyright © Yongkang Ruizan Industry and Trade Co., Ltd. All Rights Reserved.

Custom Stamping Sheet Metal Hardware Machining Factory